Pipe smoking for beginners
All beginnings are difficult, an old saying that also applies to smoking pipes.
On this page you will find everything you need to know to get off to the best start in this hobby, from buying your pipe, to getting your first smoke.
If you’re just getting into whistling for the first time, you’re probably wondering what could possibly be so difficult about the whole thing. Buy a pipe, put in tobacco and fire away! What sounds simple but has some pitfalls, because already when buying the pipe can go wrong. In the following I explain to you exactly what you have to pay attention to and which mistakes you can make ( small fun fact, when I started myself, I also made every single one of these mistakes ).

The purchase of the first pipe
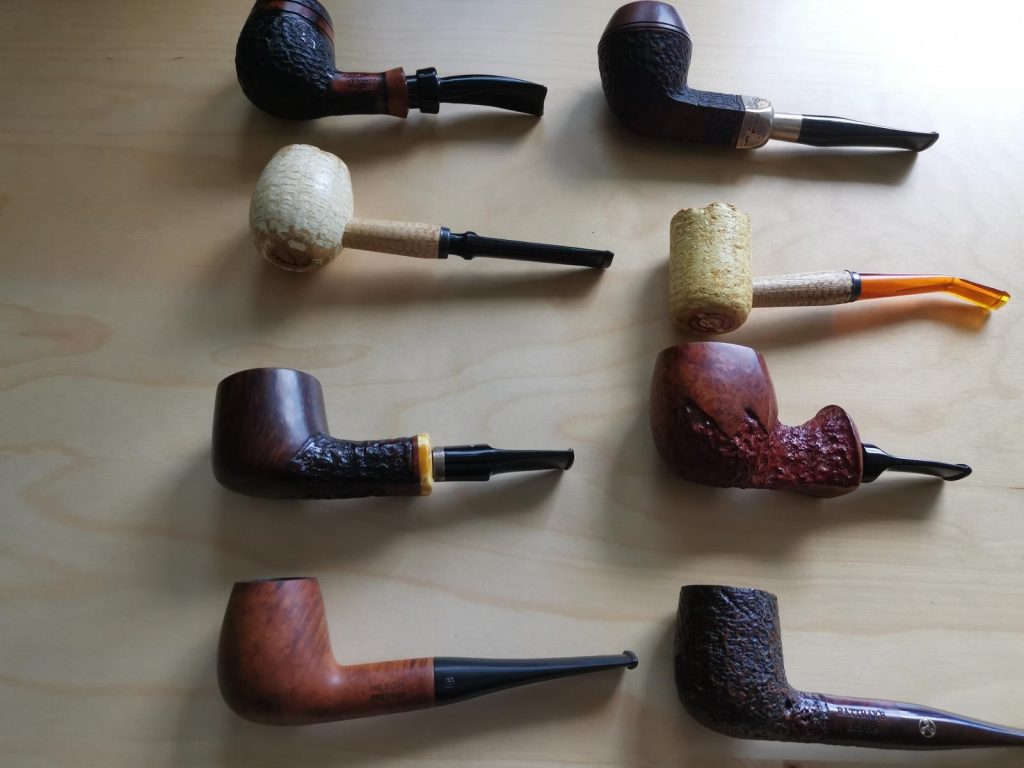
The most important thing comes first, the right pipe! Here it can quickly become confusing, because now there are almost infinite shapes and also some different materials from which a pipe can consist. From sea foam to corn on the cob to classic Bruyer wood, there’s everything your heart desires. But beware, there are also black sheep on the market who sell pipes made of ebony, rosewood and other “exotic” materials. These pipes are usually extremely cheap and much heavier than pipes from Bruyer, but they are actually from the material not suitable for smoking and often even painted instead of stained. They should urgently stay away from these pipes! They can be a serious health hazard and are not distributed by me in principle. Often you can find them in beginner sets from unknown companies.
As the first pipe is recommended to start quite classically. As a shape, I would always advise a straight, that is, a straight pipe. They are easy to handle, very easy to clean due to the straight mouthpiece and, unlike curved pipes, saliva does not run through the mouthpiece into the pipe so quickly.
If you absolutely do not like straight pipes, you can also buy a normal bent, which is not too bent. Although these have the problem of saliva reflux for beginners, they are still within reason and easy to clean.
Even though there are many fans of the long reading pipes (I am no exception) I would strongly advise against entering with such a pipe. They are much harder to maintain, break down more easily and can quickly overheat unnoticed. As a beginner you do yourself no favors with such a pipe, rather buy one later when you have more experience.
Besides the shape, it is also important to choose the right material. Bruyer wood is the standard material of most pipes due to its heat resistance, and is also recommended for beginners. A real insider tip are also the corncob pipes from “Missouri Meerschaum”. They are extremely cheap, have a rustic look and very good smoking properties. Ideal for starters, especially if you have a small budget. Simple corncob pipes you can get already from 15€
On the picture you can see a few examples of beginner friendly pipes.
What is the cost of a good pipe?
This question always comes up under guarantee and the answer is always the same: It depends 😉
Whether a pipe smokes well depends on the one hand on the material (see above) and on the other hand on the bore. The draft hole should lead directly into the combustion chamber, so that no tobacco accumulates underneath that cannot be burned. The actual price of a pipe does not depend on whether it is well drilled, but on the manufacturer and of course on the quality of the material used.
A Dunhill pipe, for example, will pretty much always have a top-notch smoking experience, but it’s also extremely expensive because you’re also paying a lot for the appearance of the pipe.
A good Bruyer pipe that can be smoked without problems you get new already from about 40 €, for corncob pipes you pay about half, depending on the design.
Refurbished used pipes, like the ones you can find here, start at 20€.
For this price you get a pipe with which you can enter the hobby without problems and not have to worry about making a mistake or damaging a pipe.
Who is willing to spend 100€ and more, which can also enter with pipes from eg Peterson quite cheap. These have excellent smoking properties, a beautiful appearance and are still affordable even for beginners.
One pipe or rather 10?
Often the question arises, how often you can actually smoke a pipe in a row or whether it makes sense to own several pipes.
This is easy to answer for pipes made of corn and meerschaum, they can be refilled and smoked again directly after smoking and cleaning. Bruyer pipes are a bit more demanding here.
It is recommended to let a wooden pipe rest for at least one day after use. When smoking, the combustion reaction forms so-called moist condensate, which is absorbed by the wood. This is something quite natural, however the wood needs some time in the air for some of it to be absorbed and some of the moisture to evaporate. If you light the pipe again and again without resting, it “bogs down”. An unpleasant odor develops and the pipe no longer tastes good and must be cleaned deeply.
This should be avoided in any case, which is why you should always let the pipe rest after smoking. Most say that one day is enough, but there are also claims that pipes need up to seven days rest. Opinions differ here, and everyone will tell you something different.
In general, though, the longer your pipe can rest between fillings, the better.
So if you want to smoke several times a day, you should call at least two pipes your own. Even as a beginner, a second pipe is a good investment, because the fast smoking, which almost everyone does at the beginning, creates a lot of moisture.
The Great World of Pipe Tobacco
After the right pipe is chosen, it’s time to find the right tobacco. This is also an extremely extensive and complex topic, which is why here is only a brief overview of the varieties and a few do’s and don’ts for the first tobacco.
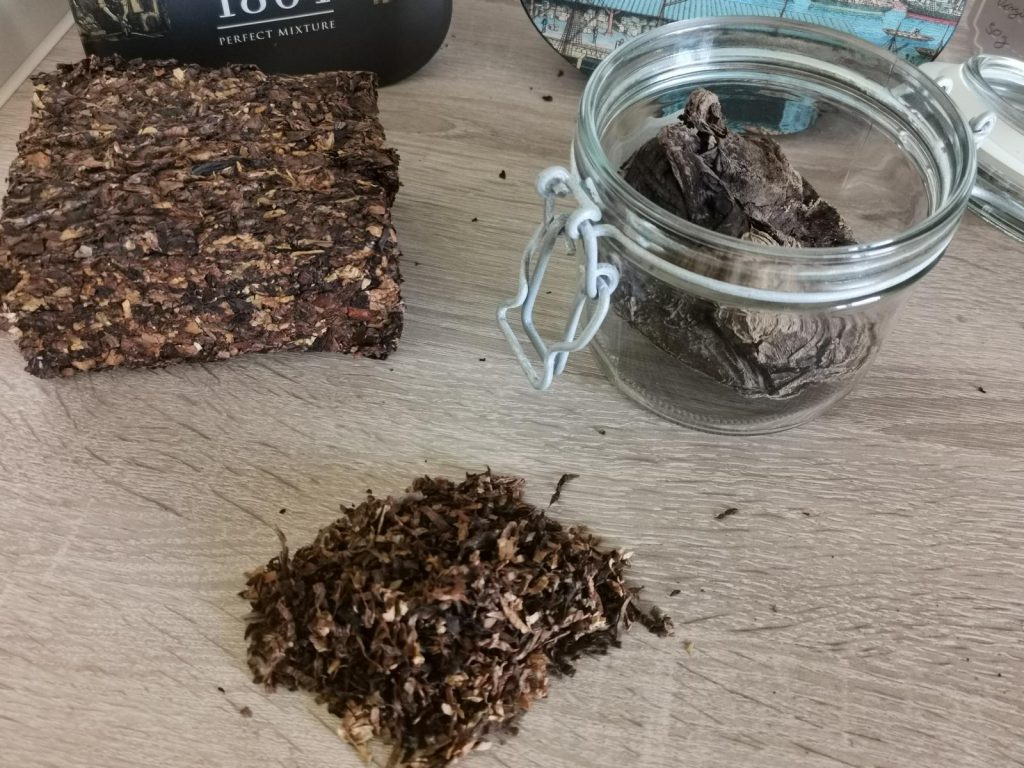
Tobacco comes in different variations and cuts. The latter can be summarized very simply for starters, buy the very common Mixture best. This tobacco is completely cut and unlike flakes, cakes or twists, it does not need to be prepared in any way, you can simply take it and put it in the pipe.
As far as flavor variations are concerned, there is now an almost infinite number of possibilities. Roughly speaking, tobacco can be divided into two categories: flavored and natural.
These in turn consist of different tobacco varieties. Virginia is rather sweet and has a certain “hay” note, Burley is nutty and is very much used for flavoring, Kentucky is rather spicy and Latakia is smoked and has a smoky mild flavor.
You should of course choose a tobacco that you like, but especially aromatics are very tükisch at the beginning. For these to really taste like they are flavored, they also need to be smoked properly, especially in terms of temperature. If you smoke them too hot, an unpleasant bite develops very quickly and the tobacco does not taste good.
Natural tobacco, on the other hand, is very easy to smoke and is much more “forgiving” of minor mistakes.
If you like the smoky taste, I strongly recommend to start with Latakia. This one has the best smoking characteristics in my opinion and is perfect for beginners. Even without experience you can achieve the best result.
If you have the opportunity, buy a few varieties in 50g cans or bags and just experiment a bit. You will be surprised how different even cherry tobacco from two different manufacturers can taste.
Accessories and odds and ends
After you’ve got your pipe and tobacco, you’re almost ready to go. Now only a few little things are missing, which will make your pipe smoking life easier.
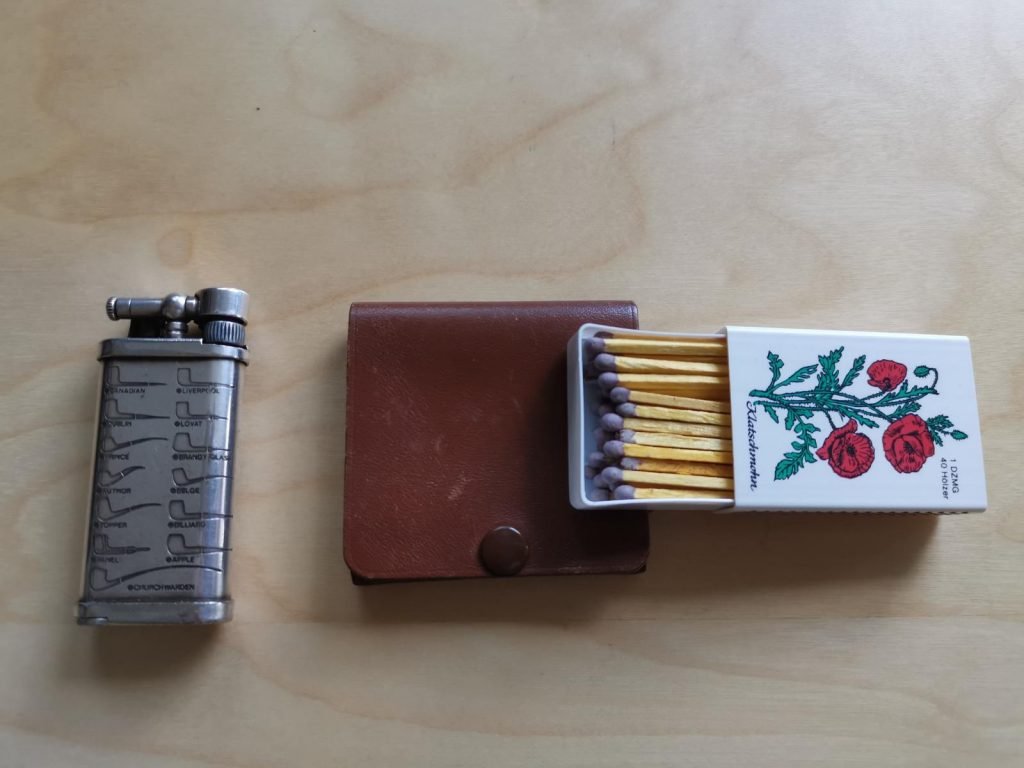
Lighter / Matches
To light your pipe you can use matches, a normal lighter or a special pipe lighter. The latter can be obtained very cheaply and will make your life much easier. With pipe lighters, the flame goes to the side and not upwards, which makes lighting the pipe much easier.
Never use a jet flame / Bunsen burner / cigar lighter! They are much too hot and damage the wood.
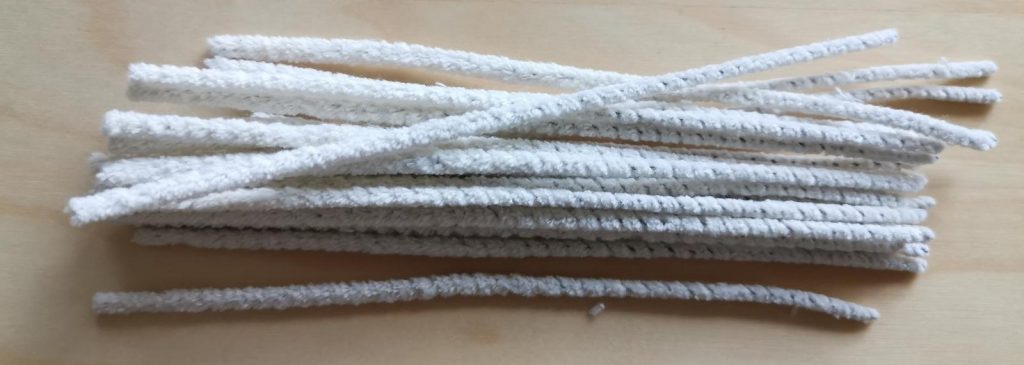
Pipe cleaner
Absolutely essential, with them you can clean the smoke channel of the pipe after smoking. Definitely get! A pipe should always be taken care of.
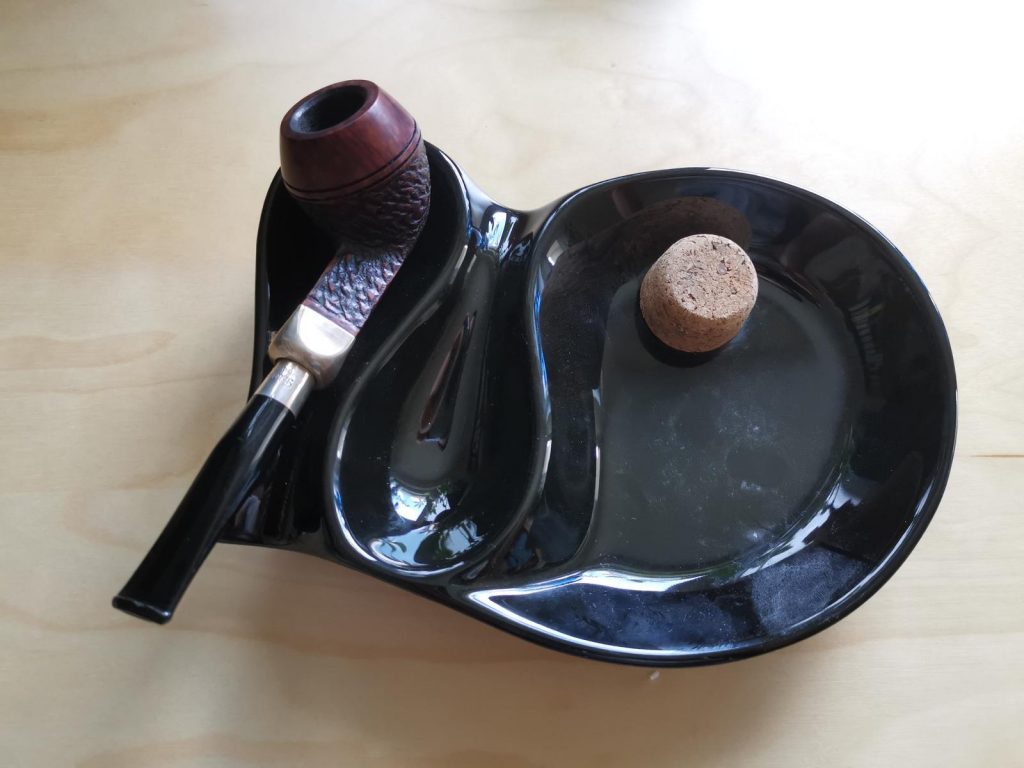
Ashtray and stand
An ashtray with a tray for your pipe is practical and usually quite cheap. If you want to save money, you can of course do without.
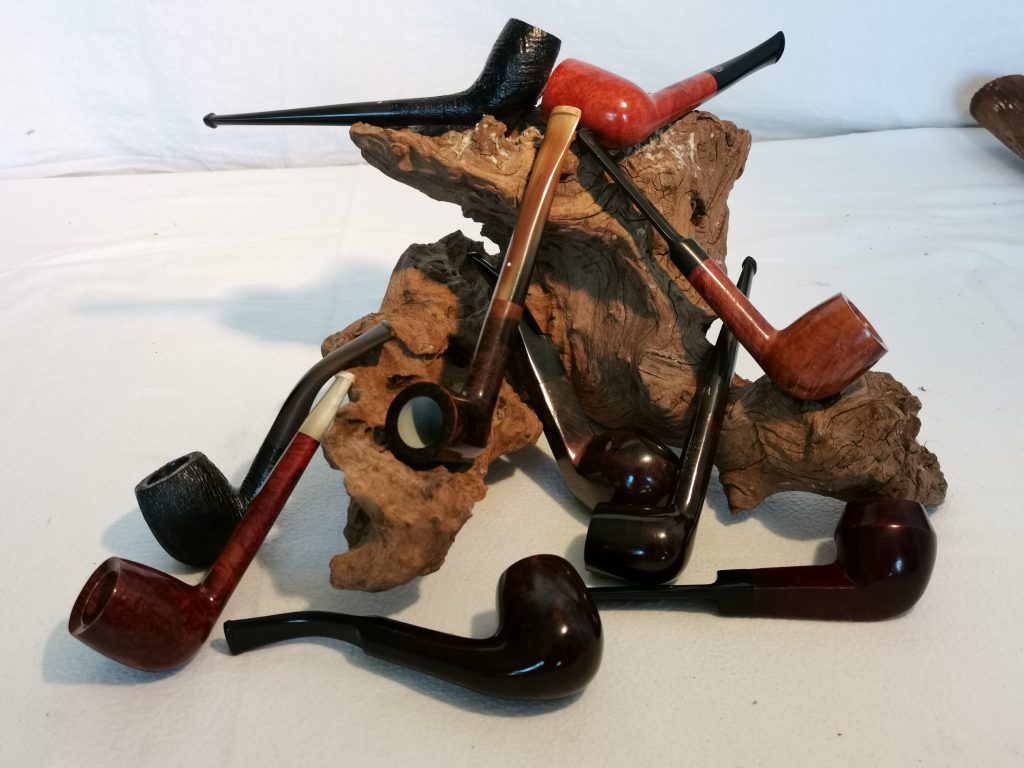
If you have several pipes, it is also worth getting a stand on which your pipes stand decoratively when you are not using them. Here, too, there are hundreds of variations, for every interior – and pipe style.
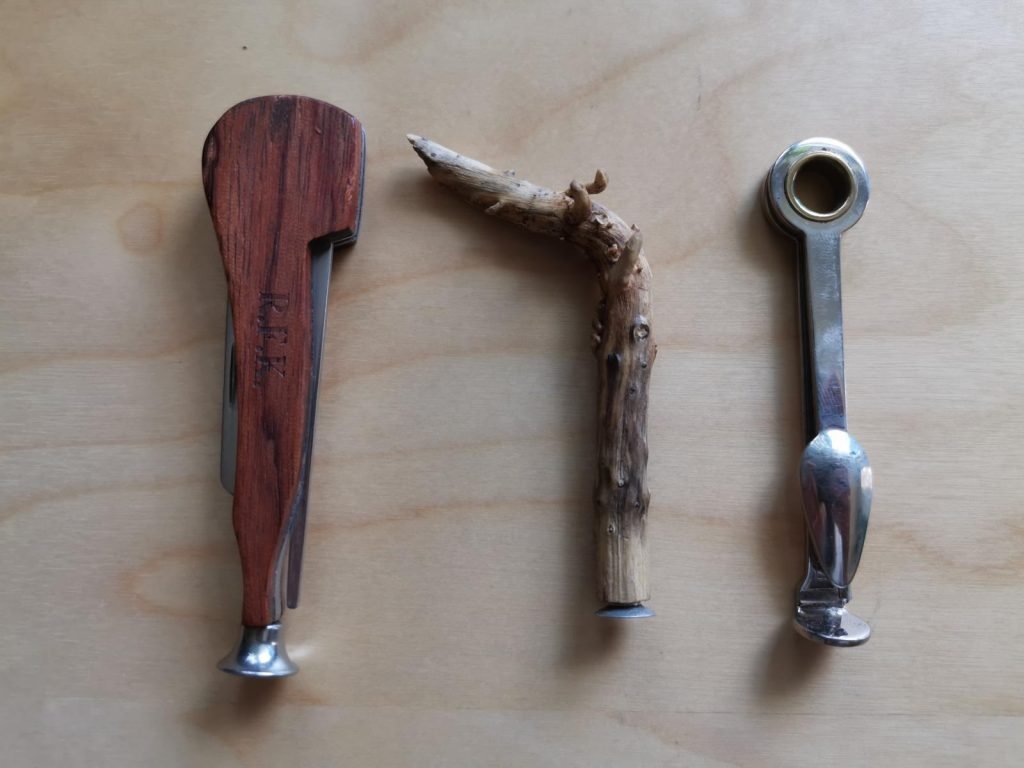
Pipe set
A small tool with tamper, mandrel and a “shovel” to clear out the pipe. Something like this you can get for 3€ to 10€ and you need it for smoking as well as emptying the pipe.
After some time, I assure you, you will have at least 10 of them lying around the house 😉
Filter
Depending on whether you want to smoke with filter, or without, you will of course need a few of them. For beginners, I actually find it easier to smoke without a filter, as the draw is easier to control when smoking and there is no “artificial resistance” in the pipe.
The most popular filters are probably by far the 9mm filters from Vauen.

Plugging the pipe
Now it’s time to get down to business: the pipe must be stuffed with tobacco so that on the one hand it is filled firmly enough to offer a certain resistance when pulling, but on the other hand not so firmly that it becomes uncomfortable. This is the most difficult step in the beginning and also a simple matter of experience that only comes with time. I give you here a small step by step guide that will help you get started. Everything else comes naturally over time.
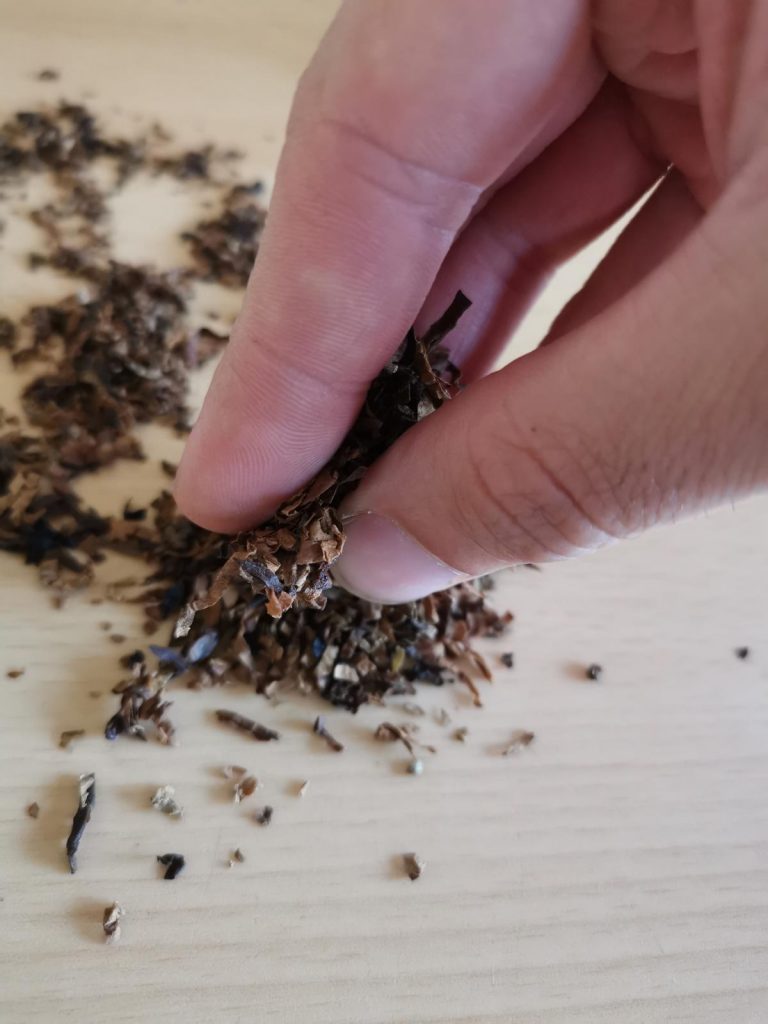
First layer, the “trickle
First of all, before I really “plug”, I let tobacco “trickle” into the pipe without exerting pressure. Simply take the tobacco in your fingers and let it fall into the pipe without pressing until it is full.
The first plugging
Now take some tobacco between your fingers and stuff it into the pipe with a little pressure. As you do so, press down the layer you previously filled. The goal is for the loose tobacco to go down, forming a sort of “loose layer” there, so you can comfortably draw through the smoke channel.
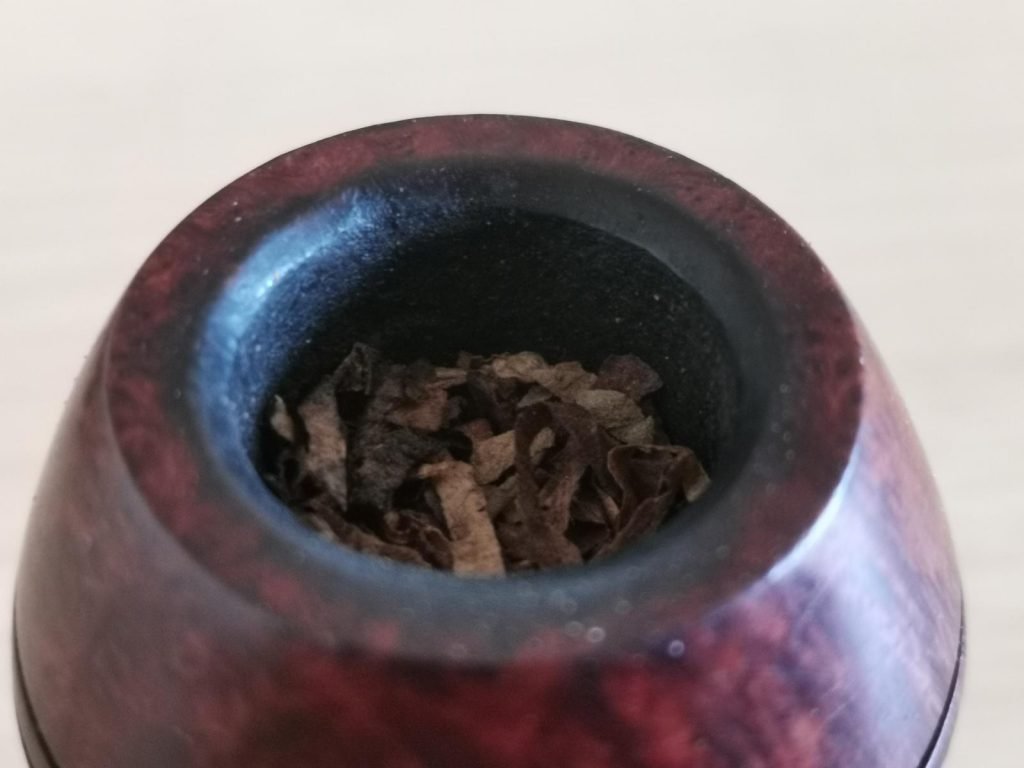
Interim result
After the first plug, your pipe should still have air in the combustion chamber, as shown in the picture above, while the somewhat compressed tobacco is already sitting below.
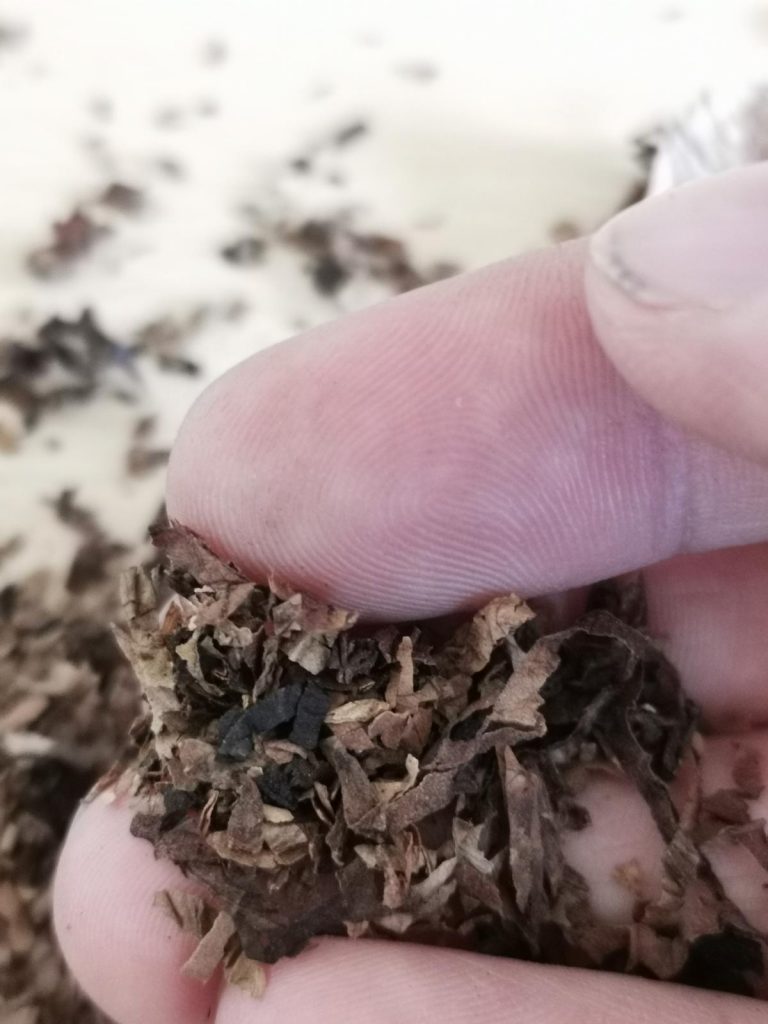
Second plugging
Now, like last time, take some tobacco in your fingers and put it into the pipe, but this time much less than in the first step. After that, the pipe should be pretty well filled, but not brimful. Keep in mind that the tobacco expands a little when lit and needs a little space.
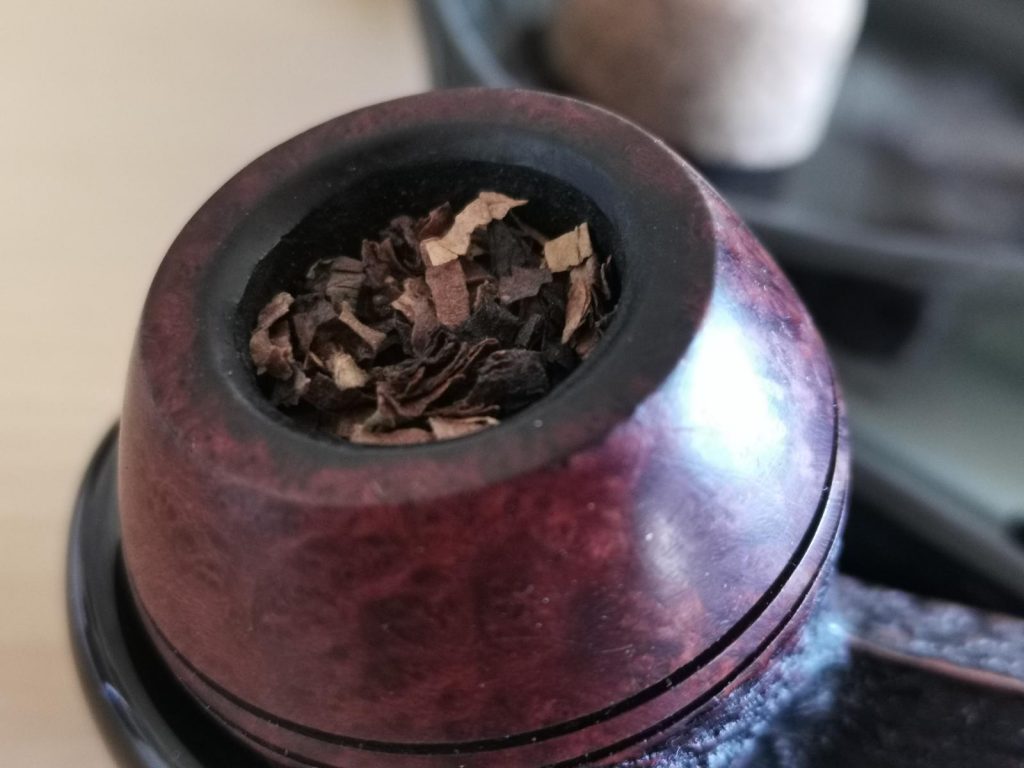
Result
Your pipe should now be ready to be filled. If you think there is still too much room up to the edge of the head, sprinkle a few small pieces of tobacco into the chamber. These are easier to light and ensure that your pipe can be lit better.
With this you are already done with the plugging. Please always keep in mind that this is not an exact science. These tips are there to help you get started. Over time, everyone finds their own technique and rhythm.
The smoking
Now we come to the real pleasure of the whole thing. After you have finished tamping the pipe, take your lighter or matches and slowly light the tobacco. Walk across the entire surface several times while slowly pulling on your pipe.
Try to bring the tobacco as evenly as possible to glow, and after a while use your tamper to gently push the highly swollen leaves back down.
From here on you have arrived at the actual pipe smoking, congratulations 🙂
You can now pull on your pipe in a relaxed manner and let the gentle smoke flow in and out of your mouth. If you feel that the pipe is too hot and the smoke is scratchy, you should draw slower and not too often.
In between, press the tobacco down lightly every now and then and see if an even layer of ash forms. Try to light the tobacco as evenly as possible, so that it burns nicely from top to bottom and no “hole” with embers is formed.
If your pipe goes out in between (which actually happens every now and then) just light it again. Most of the time it is enough to hold the lighter to the head to continue smoking.
By the way, you don’t have to smoke the pipe to the bitter end, literally, because the condensate usually makes the last bit of tobacco in the pipe very harsh. If you notice that the pipe no longer tastes good, just let it go out. Below you can read what to do after that.
Fairy tales about it being bad when a pipe goes out while smoking can be safely ignored, by the way. That doesn’t matter at all and is absolutely normal, especially if you’re doing something else on the side.
Now just enjoy your pipe, try something around with the draw and the plug and always remember, with time you will acquire many things yourself and maybe do them completely differently. These tips only serve to make the beginning easier and contain things that I would have liked to know at the beginning.
In the next section you can read how to care for your pipe after smoking.
Pipe care after smoking
Now that you have smoked your pipe in peace, you are probably wondering what to do with the tobacco residue and the filter.
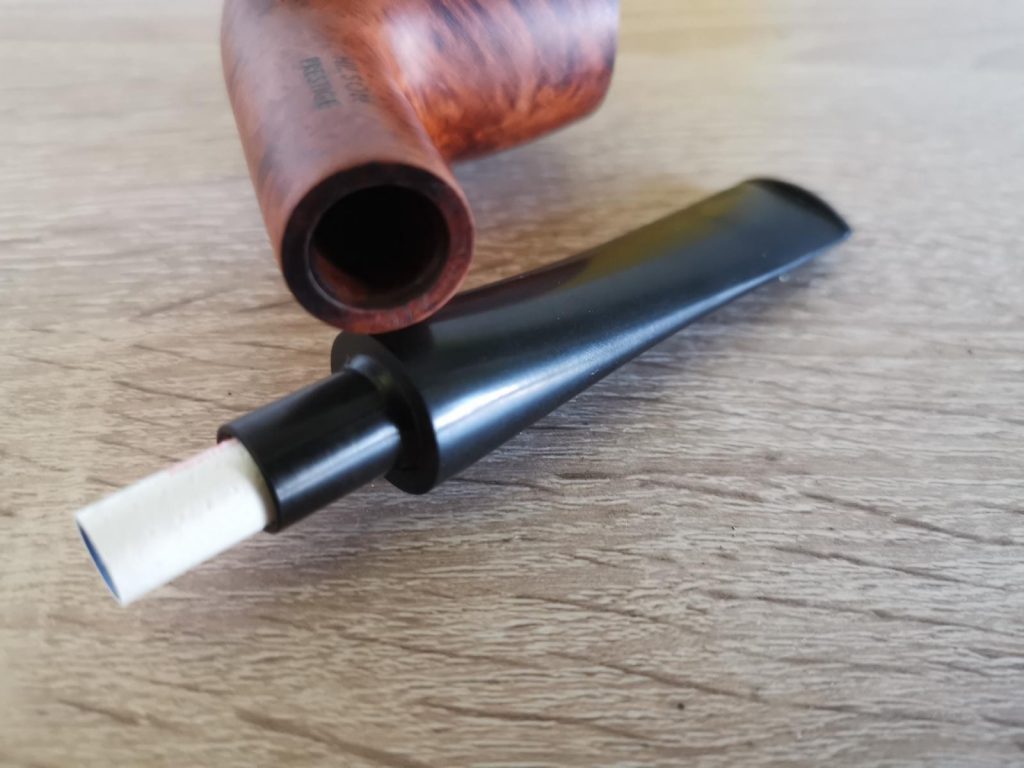
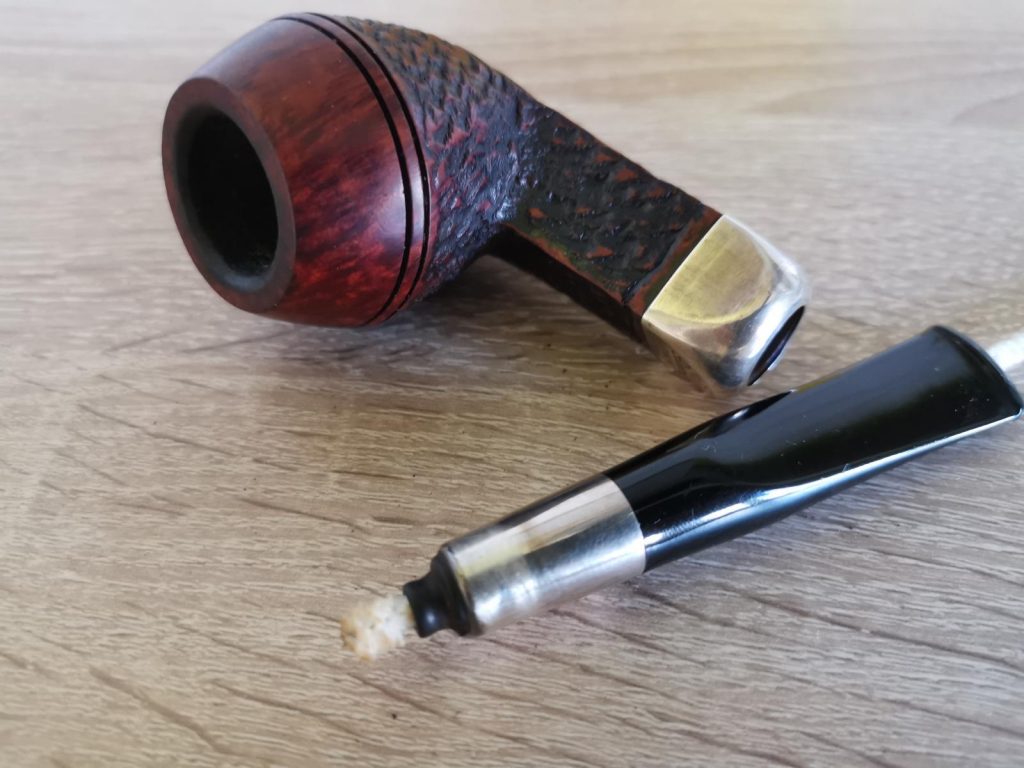
Important: Let your pipe cool down before you start to remove the mouthpiece. If the pipe is still warm, it is more difficult to turn because the material expands. You run the risk of damaging the pipe or destroying the fit.
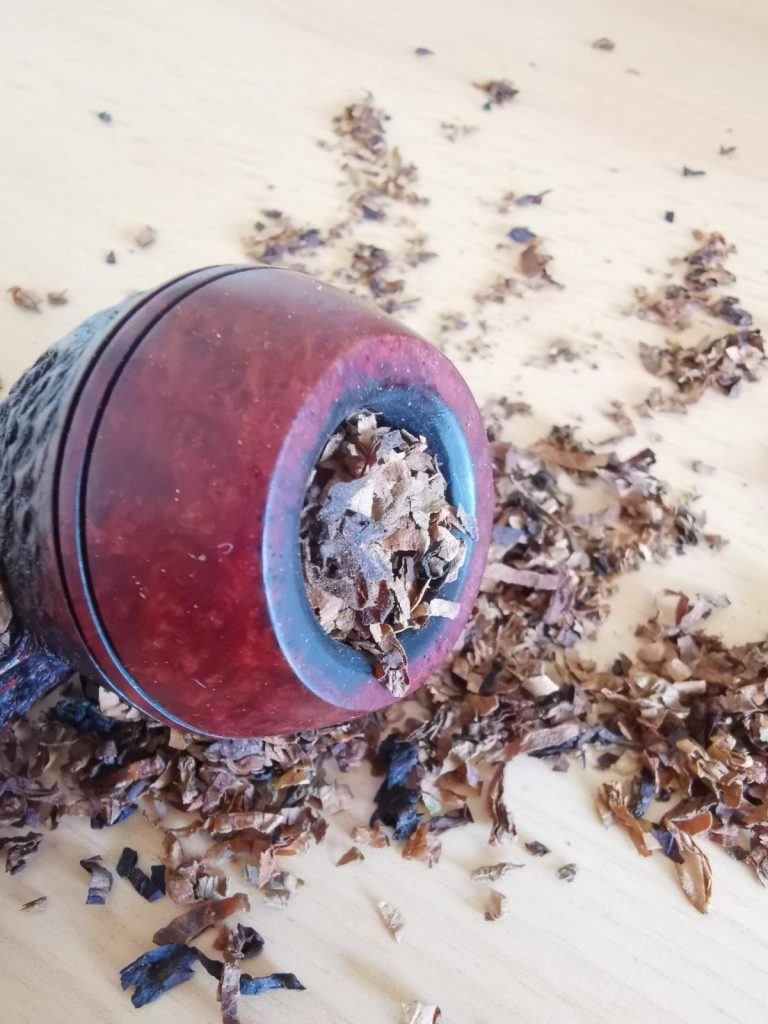
Clear the head
First, remove the remaining tobacco and ash from the head. The easiest way to do this is to use the small shovel and mandrel on your pipe tool.

Remove filter
If you have smoked with a filter, turn down the mouthpiece (always turn in one direction) and take out the filter. It is probably a little damp from the condensate.
Filters are disposable products and belong in the trash after use!
Cleaning with pipe cleaners
Take a pipe cleaner and clean with it the inside of the mouthpiece and also the chamber for the filter.
Then do the same with the smoke channel and the bore of the pipe in which the mouthpiece sits. I personally also like to use a cleaner to clean the combustion chamber a bit.
When you have removed all the tobacco residue, reassemble the pipe and put it aside. It should now be given at least 24 hours to dry. Do not lock them away airtight in any case, otherwise mold or the above-mentioned bogging may occur.
After one day your pipe will be ready for use again and you can start plugging again 🙂
That’s it. You now know everything you need to know about pipe smoking. Everything else is try, experiment and have fun.
Have fun with this wonderful hobby.